Introduction
Once you have your page map in hand, it’s time to build your website. This blog will not explain how to install WordPress. There are plenty of tutorials, websites and books that discuss this topic. The idea is to show you how the preparation of the working environment and the creation of the homepage were done.
Staging site
As said in the previous article on hosting, it is strongly advised to create at least 2 websites. The first one will be the production site, the second one, the staging site. If you have the possibility to create more, don’t hesitate to create a third test or development site. On this site, the main site is called www.fuyens.ch. The test site is called staging.fuyens.ch. It is of course a sub-domain. The creation of this one is free, unlike a second domain name.
Note that the name of the sub-domain staging.fuyens.ch is not chosen by accident. Most of the paid plugins will charge you for a one year license, unless you buy a license for an unlimited number of domains. This is the case with Elementor Pro which allows you to install your license on one domain (fuyens.ch) and your sub-domain (staging.fuyens.ch), for the price of a single license.
Cleaning WordPress
It all depends on your host, but often, it configures and prepares WordPress in a certain way that may or may not suit you. To get started, it is recommended to :
- Remove all plugins (Extensions menu)
- Delete all articles
- Delete all categories (except the default one, unclassified)
- Delete all pages, then creating a new home page, named here Home FR. This nomenclature will be explained later.
- Delete all medias
- Delete all themes, except the default one (Menu Appearance – Themes)
The first settings
The theme
This website is built with Elementor. To use it, you will have to start by installing the “Hello” theme. You can then delete the default theme and keep only “Hello” as your only theme.
The customization
With the “Hello” theme, customization is at its simplest because everything is done, or almost, on the Elementor side. The customization page is also called “Customizer”, a term that is often used in blogs.
- In the identity of the site, install your logo.
- Change the title of the site if it is different from your domain name.
- Write a catchy slogan.
- Install your icon in 512×512 pixels.
Finish by clicking on Publish, then return to the WordPress administration console.
Settings
All the settings of WordPress will not be reviewed either. It would be too tedious. The chapter below shows the ones that have been done.
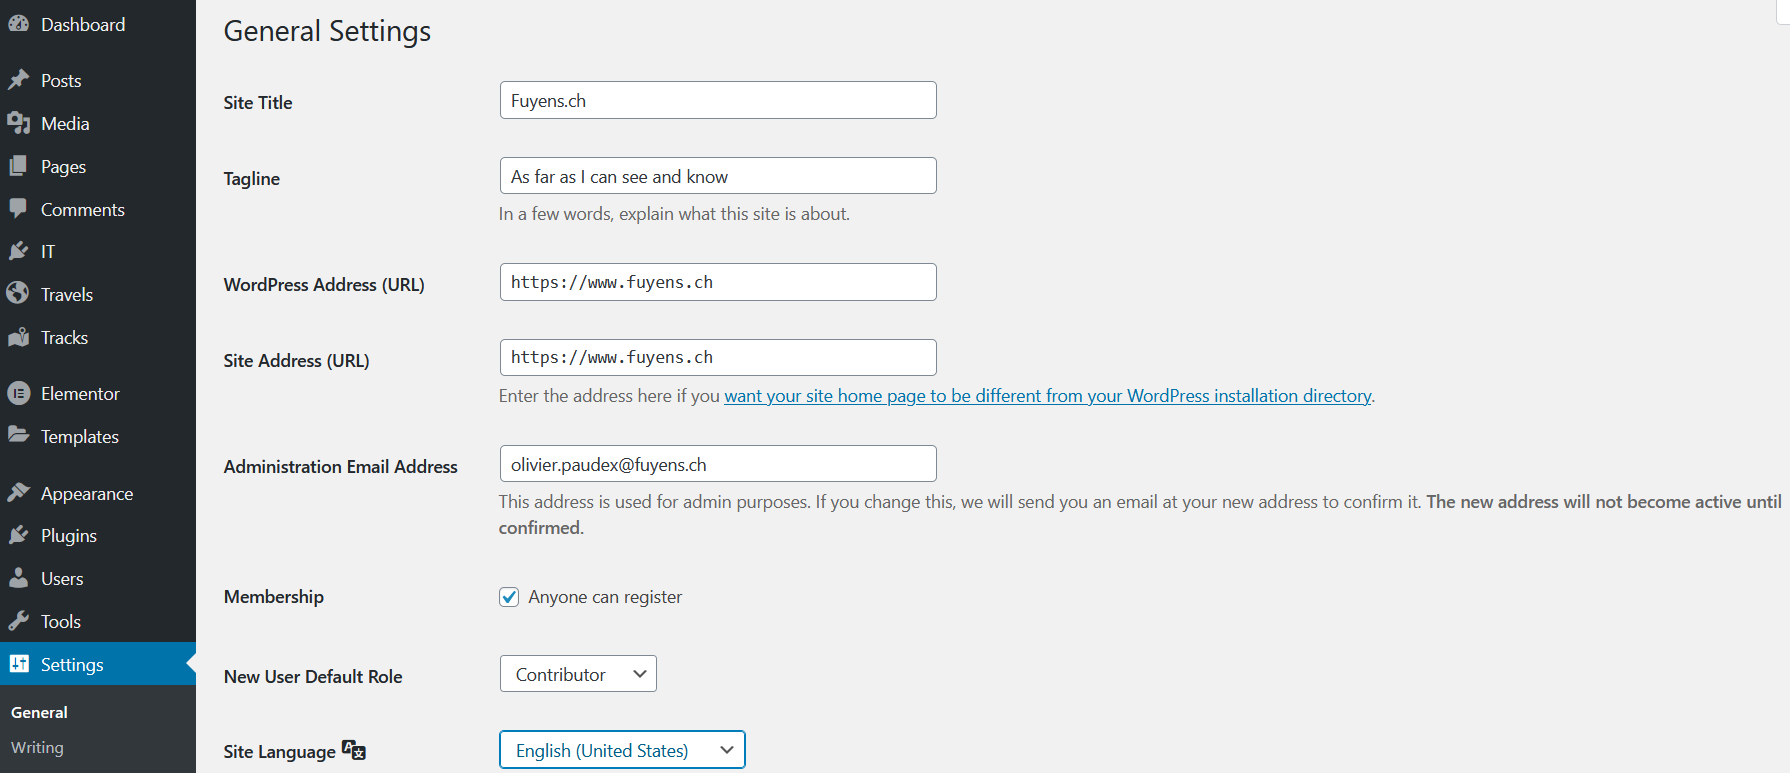
Settings – General
- Check the title of your site, your slogan
- Switch the site to HTTPS, if you can
- Make sure the email address matches the administrator’s
- I will come back later on the default registration and role options. Leave them as default or follow me
- Set the site language
- Set the time zone and date/time formats

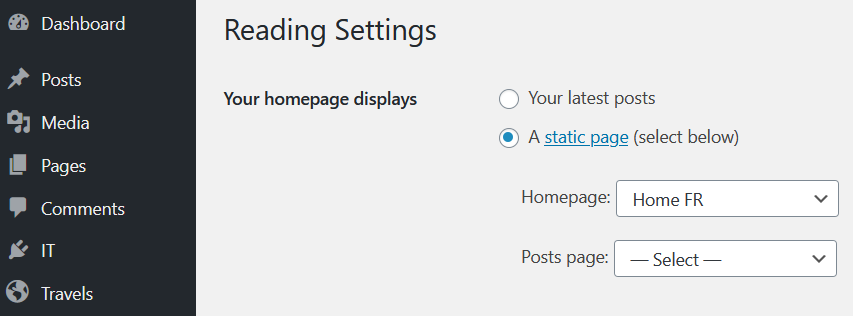
Settings – Reading
- Select the “Home FR” page as your home page

- As long as your site is under construction, check the box “Discourage search engines from indexing this site”.
The subdomain “staging.fuyens.ch” being a test site, it should always have this option checked, to prevent potential visitors from finding it.

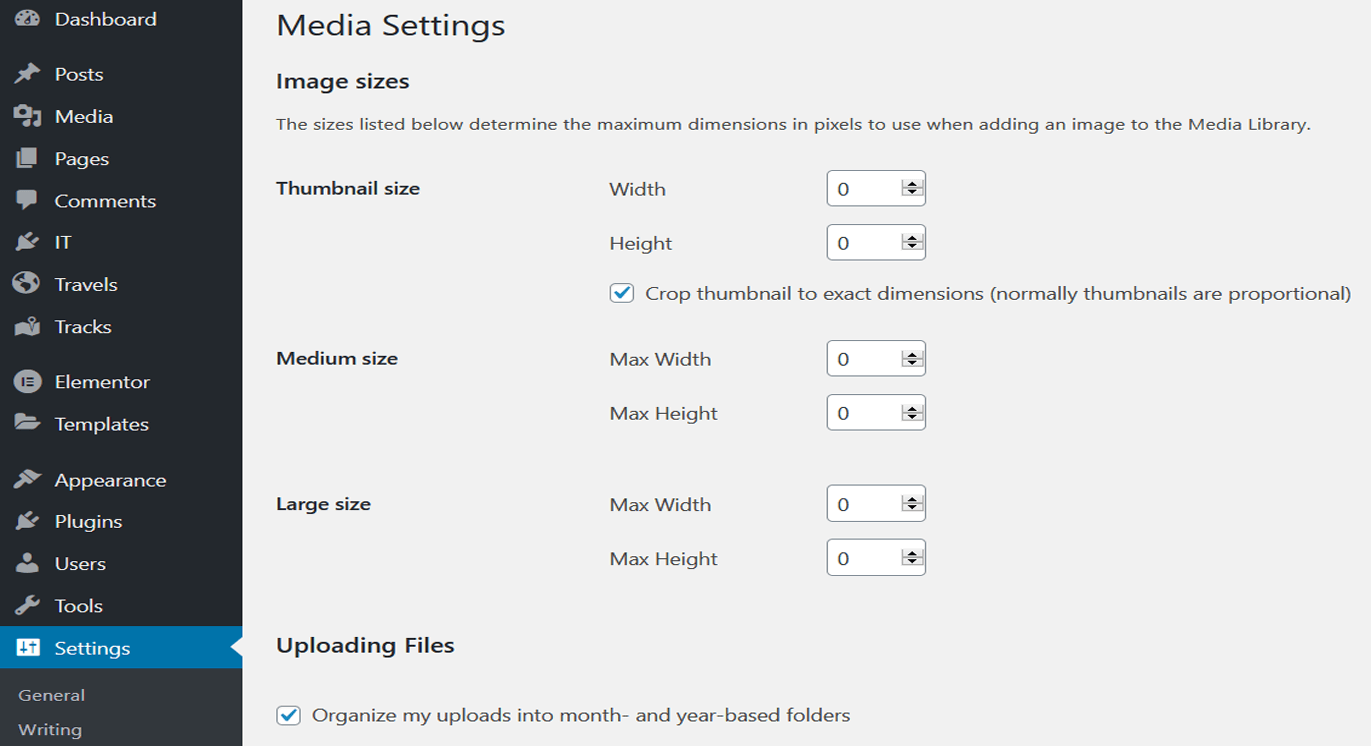
Settings – Medias
- WordPress manages image sizes automatically. By setting all these values to zero, WordPress will keep the default settings.

Settings – Permalinks
- Make sure that the permalinks setting is under Post name.
Installation of Elementor
The installation of Elementor is done in two steps. The first is the free plugin found in the plugin library. The second is the Pro version, for which you will receive a ZIP file to upload and activate. At the end of the operation, we have two plugins in the list.

Elementor settings
There are many options, but few settings in Elementor. In the general tab, check the two options to disable default colors and fonts.
Since Elementor 3.0, fonts and colors are managed in the plugin settings, which I think makes these settings obsolete.

- In the advanced tab, select Yes to load Awesome 4 font compatibility.

The Elementor plugin settings
As mentioned in the note above, the Elementor settings have been expanded since version 3.0. The management of the color palette and fonts is now done directly in the Elementor plugin. For the creation of this site, which started with the version 2.8 of Elementor, the color palette was rebuilt in Elementor. On the other hand, the management of the fonts was done with external style sheets. You are free to use the globalized settings of Elementor or not.
The Global settings
Edit your homepage and click on the hamburger in the upper left corner.

I give you in bulk the options that I modified.
- In Layout, set the space between widgets to 0px. This allows you to paste the widgets together.
- Further down, in Default Layout, select Elementor Full Width. This sets the layout to full width, but more importantly, includes the header and footer.
- In the Breakpoints section, select 1024px for tablet and 768px for mobile.
- In the global colors section, add your palette (only since version 3.0).
I don’t handle fonts by default here, but rather in a CSS style sheet. I talk about this in the post “The child theme and global settings”, which follows this one.
The settings of the page
The parameters of the page are configured by clicking on the cogwheel in the lower left corner.

- Select Yes to hide the title.
Final Words
Now try to display your first page in your browser by entering https://www.your_domain_name.
The result should show you the management bar of WordPress, and your logo. This one is displayed and it is normal. You can customize it by creating a header. Similarly for the management bar of WordPress. You can also remove it with a few lines of code.
To follow in the next chapter, the child theme and the global settings.


3 Responses
I wasn’t certain I could write writing such a long article in the beginning. Your style certainly attracted my attention. You always deliver amazing information. Great Article Neil. Though I had read the article just a few days back, I didn’t leave a comment. But, I thought that it merited a”thank you. I will be using some of these tips on my own websites very soon.
Thank you for leaving me such a positive comment
Thanks for your blog, nice to read. Do not stop.