Introduction
According to the site map, it was planned to create a login system for users. It is not very useful, but the challenge was very interesting from an academic point of view. Elementor has provided a type of template called modal windows (popup windows), which makes it very easy to set up such a system.
Starting well
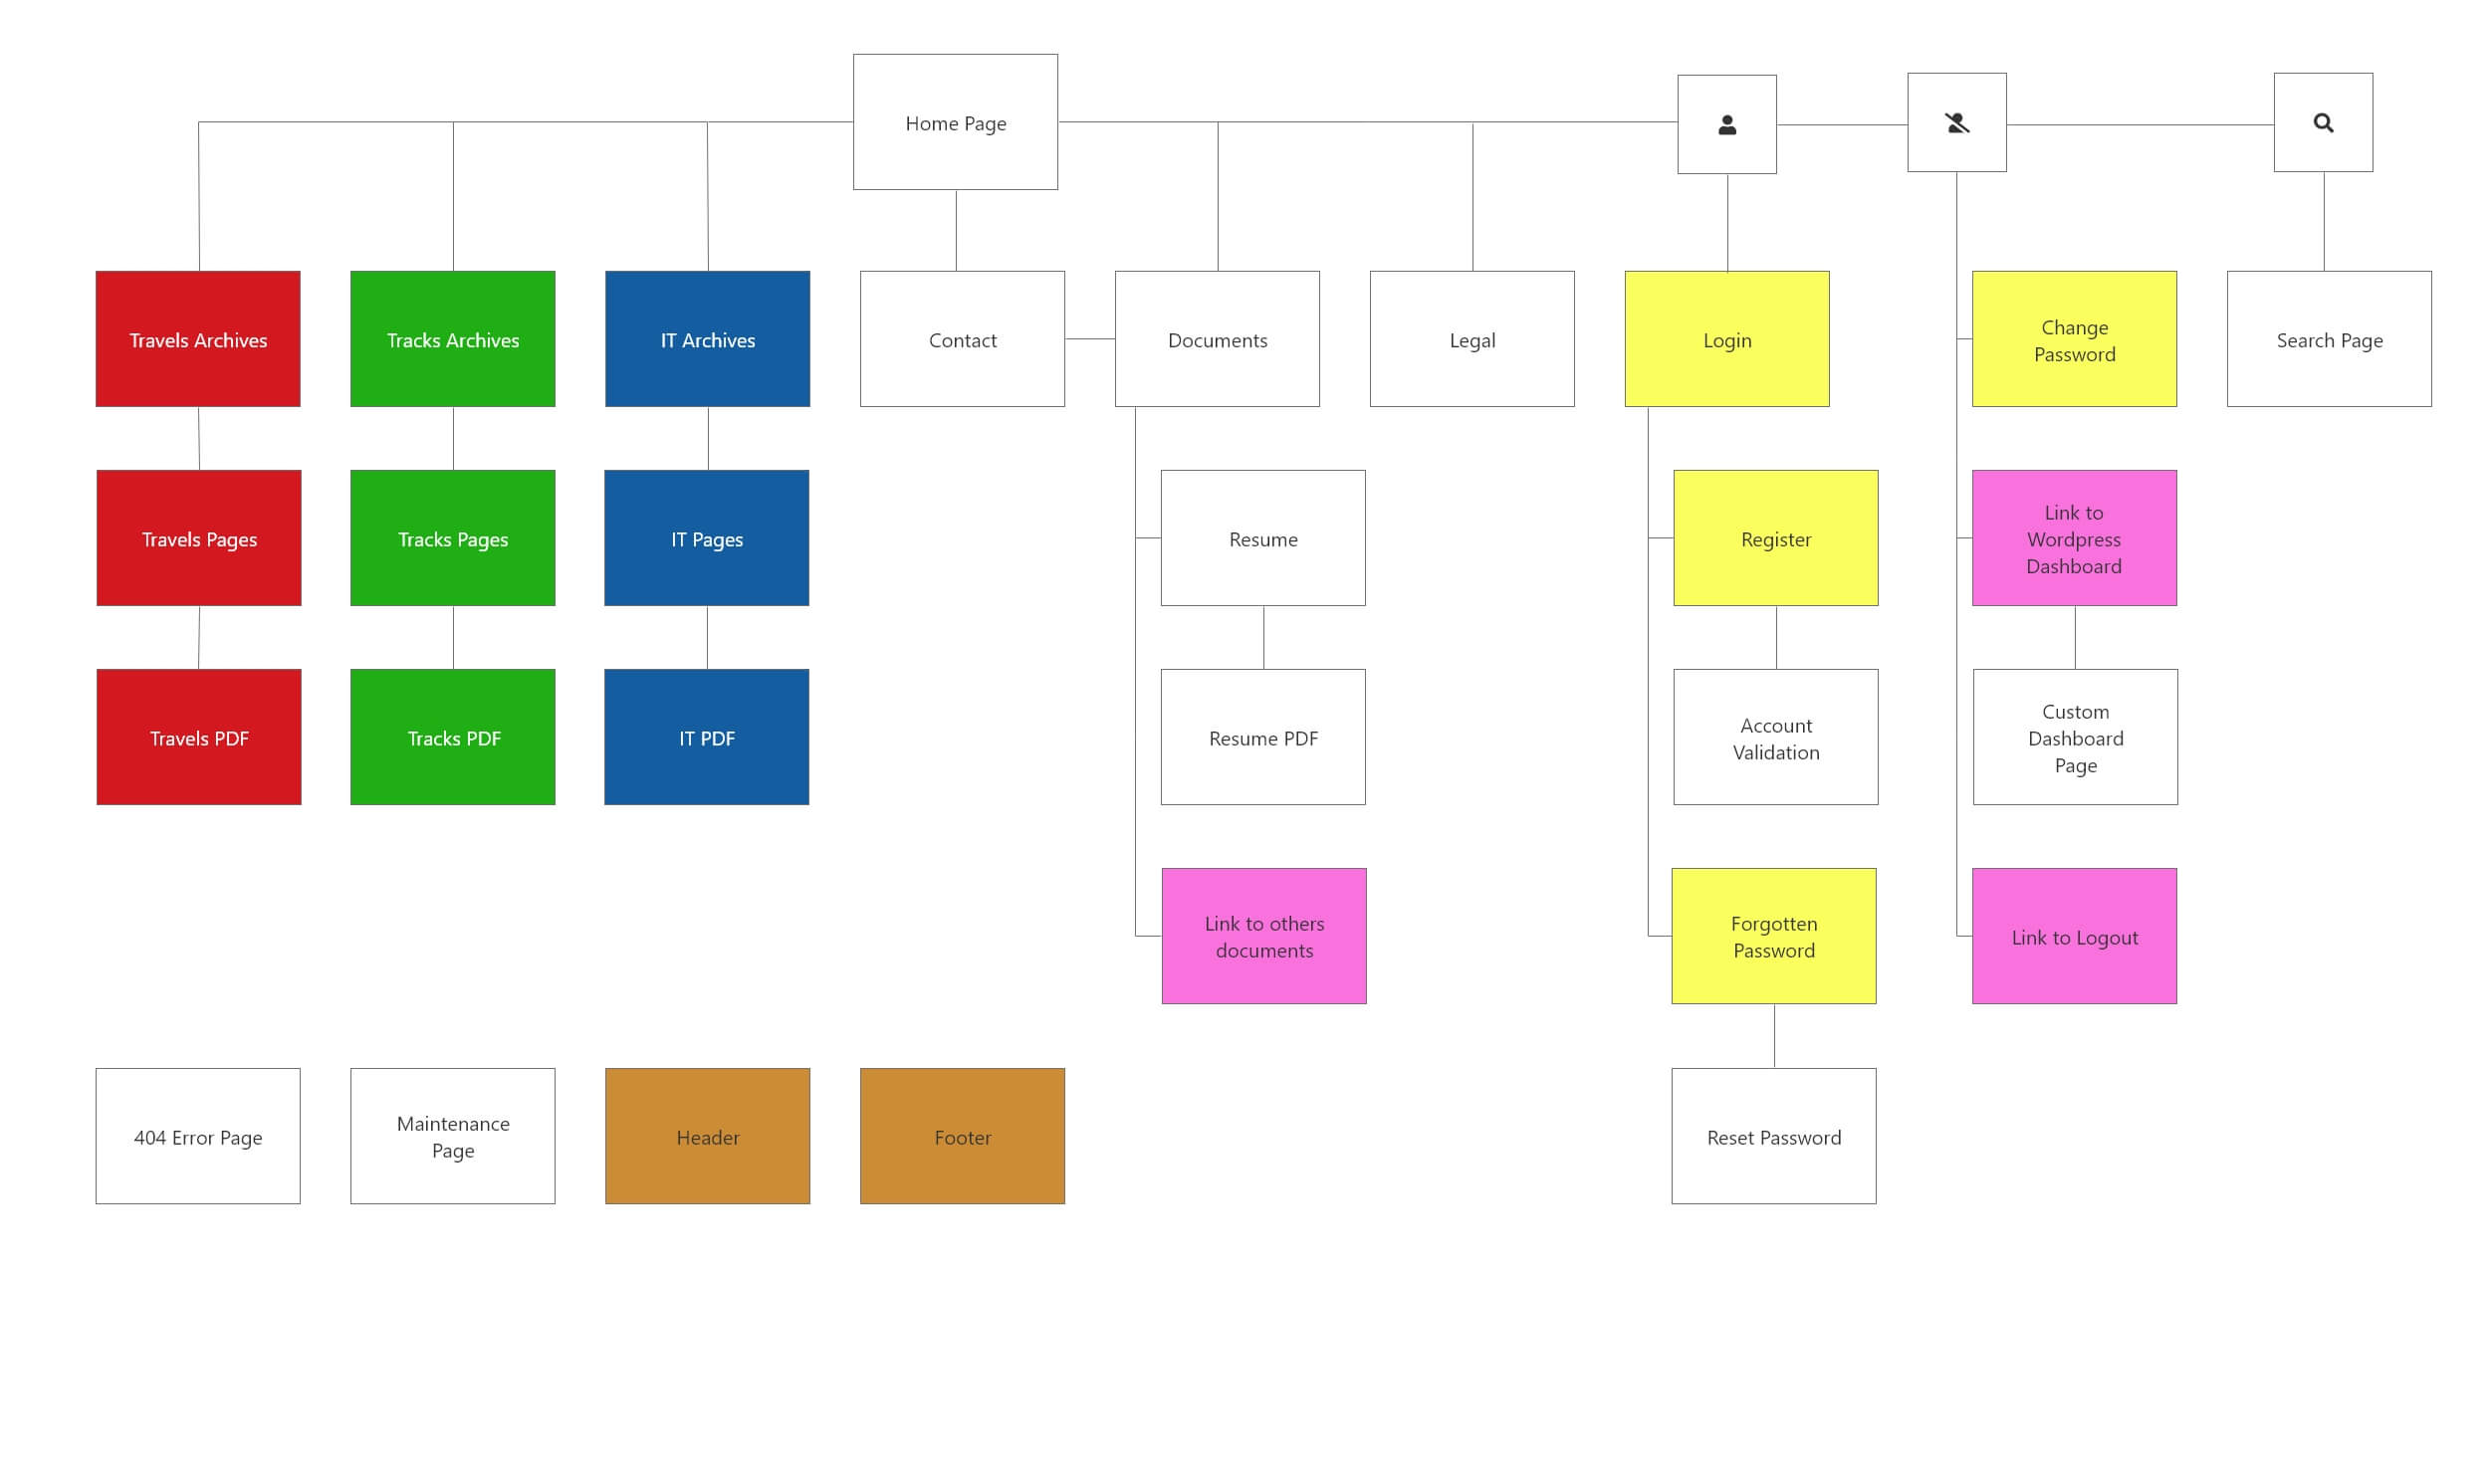
If we refer to the page map above, we will have to create four modal windows (in yellow), two new pages (in white), two links (in purple), as well as customize the WordPress administration console.
To explain the reasoning, it’s time to take a step back and think about the interaction of an administrator or contributor and the reasons for wanting to create a logical sequence of modal windows and the simplest and most logical way to give them substance.
- The first obvious reason is to open the site to other people than yourself to contribute to the creation of content.
- The second reason is purely aesthetic. It is to replace the ugly WordPress login window by another one, fully customized.
- A third reason would be to give contributors a simple way to register and change their password, without having to ask the site administrator.
That being said, we need to think about the sequence of modal windows to create the connection system. Here is the proposed thinking :
- The first window that should appear is the login window, available by clicking on a login button.
- If the contributor does not have a user account, there should be a link to redirect them to a profile registration modal window. The site must be able to send an email to the user to confirm that the user is a natural person with a valid address.
- If the contributor has forgotten their password, there must be a link to a modal window to retrieve it. The site must also be able to send an email to the user to confirm that the user has requested a password reset.
- Once the contributor is logged in, they should be made aware of this by clearly indicating their name in a custom menu.
- The contributor must be able to change his password, an action that has nothing to do with forgetting his password. This leads us to the creation of a fourth modal window.
- The connected contributor must be able to access a simplified and personalized WordPress administration console.
- The contributor must be able to log out.
Expand the header with a login menu
The first step is to create a login button in the header. If we consider the above points, it will quickly become clear that we need to create a second button for logging out. Furthermore, the logout button must call a custom menu so that the contributor can change his password and access the WordPress console. The best solution will be to use a menu instead of a button and to switch it according to the state of the login or the logout.
Creating the login menu
The menus are created directly in WordPress under the “Appearance” tab. The login menu has nothing to do with the main menu of the site, it is necessary to create a second menu completely independent. The same goes for the logout menu. To create menus, you must assign them a location. This location depends on the theme used. With the “Hello” theme, Elementor has only provided one location. Fortunately, these locations can be added by PHP code.
So start by creating a new PHP file, and name it “menu.php”. In it, create a function to add new menu locations to the theme. This code allows you to place three menus, the main menu location being created by default.
// Register the menus
function register_menus() {
register_nav_menus (
array (
'login' => ('Login'),
'logoff' => ('Logoff')
)
);
}
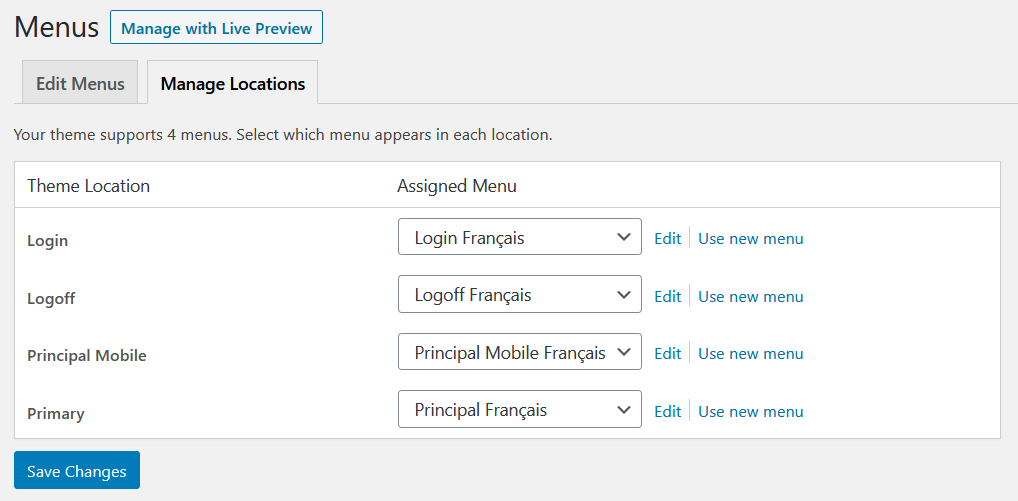
add_action ('after_setup_theme', 'register_menus');The locations added by code are displayed in the menu configuration window. In the example below. You can see the word “French”, next to the menu. This is added automatically by the “Polylang” plugin when the site is translated into several languages. The subject is covered in the chapter on multilingualism. The “Main Mobile” menu is a menu specially created for cell phone screens. Regarding the “Main” menu, it is created by default.
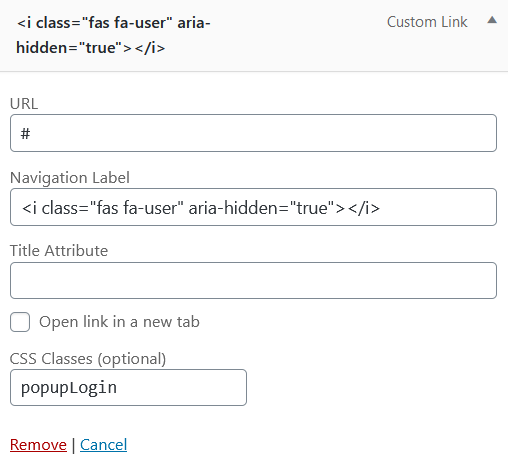
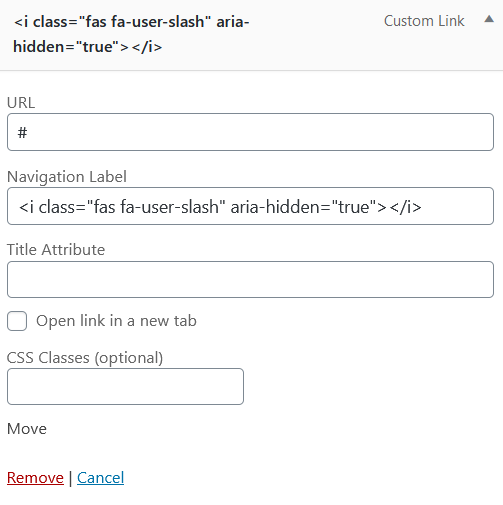
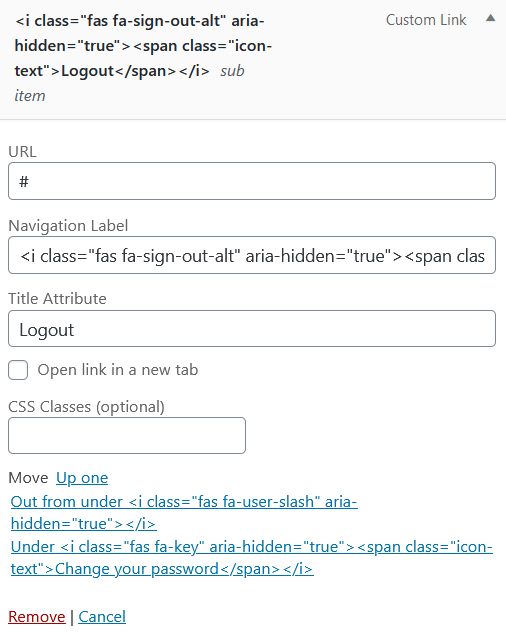
Once this is done, go to the “Appearance” tab of WordPress to create the login menu. Insert the HTML code to display the icon and a pound sign (#) for the URL address. Display the CSS classes from the screen options if they are not displayed and enter the “popupLogin” class. This is the class that will open the modal window.
Finally, don’t forget to assign the menu to the login location.
Creating the logout menu
The logout menu is a little more complex, as it consists of the icon and a sub-menu with the following options :
- User Identity
- My Dashboard
- Change your password
- Logout
The logout menu is similar to the login menu, except that it does not have a CSS class, because it does not call any modal window.
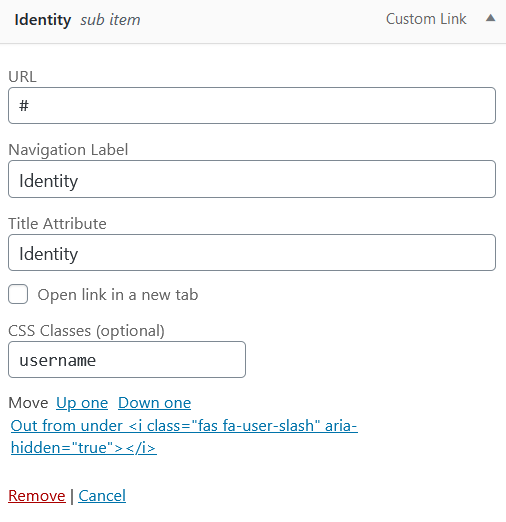
- The “Identity” menu has an HTML title attribute of the same name and a CSS class called “username”. It will display the name of the currently logged in contributor.
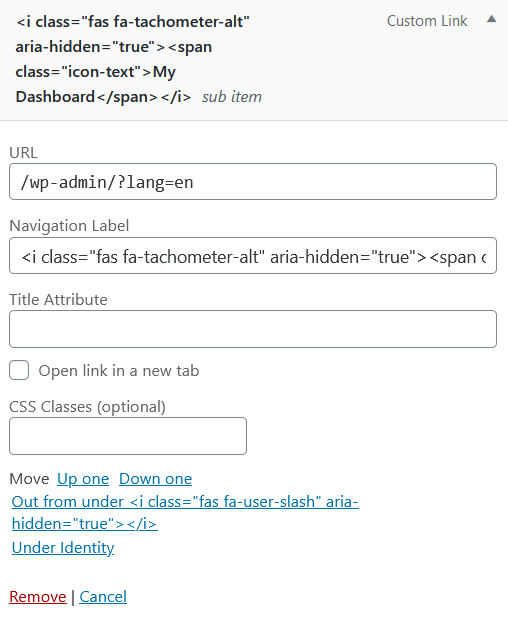
- The “My dashboard” menu is nothing but a link to the “WordPress” console, called “wp-admin”. The parameter “?lang=en” is related to multilingualism.
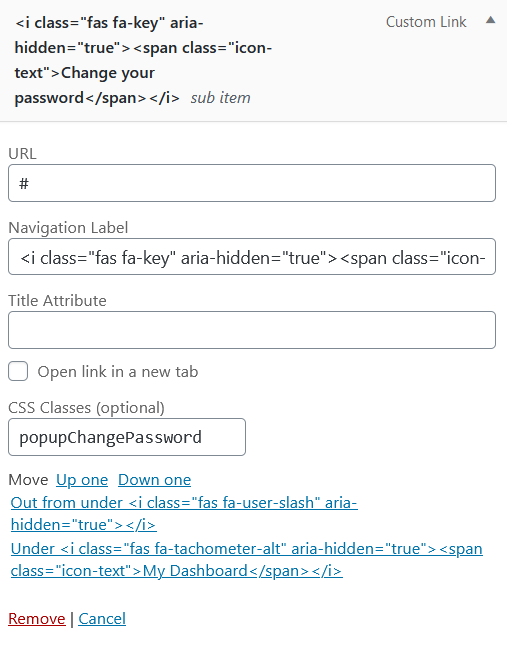
- The menu “Change your password” has a CSS class called “popupChangePassword”. It will call a modal window.
- The “Logout” menu has an HTML title attribute of the same name. It will allow the user to log out without going through the standard WordPress logout screen.
Switching between login and logout menus
To switch between the two modes, you will have to enter a piece of code in PHP. This one is based on the “wp_nav_menu_args” filter. It will display the login or logout menu according to the user status, due to the “is_user_logged_in” function and the menu name, due to the “wp_get_nav_menu_object” function.
// Switch between login and logoff menu
function menu_loginout($args = '') {

  // Get object menu slug
  $menu_obj = wp_get_nav_menu_object($args['menu']);
  $menu_slug = $menu_obj->slug;

  // If user is logged in and menu is not primary
  if (is_user_logged_in() && $menu_slug != 'principal' && $menu_slug != 'principal-mobile') {
    $args['menu'] = 'logoff';

  // If user is logged off and menu is not primary
  } elseif (!is_user_logged_in() && $menu_slug != 'principal' && $menu_slug != 'principal-mobile') {
    $args['menu'] = 'login';
  }
  return $args;
}
add_filter ('wp_nav_menu_args', 'menu_loginout');
The “Logout” and “Identity” functions
Both functions are based on the “wp_nav_menu_objects” filter. This filter allows to act on the objects of a specific menu. In the case of the “Logoff” menu, the two objects are differentiated by their title attributes, “Logout” and “Identity”.
- La fonction “wp_logout_url”, permet de rediriger l’utilisateur sur la page d’accueil après la déconnexion.
- La fonction “get_current_user_name” est une fonction propriétaire décrite ci-dessous.
// Update Logoff menu
function update_logoff_items_menu ($items,$args) {

  // If menu is 'logoff'
  if (!is_admin() && $args->menu == 'logoff') {

    // Get current URL
    global $wp;
    $current_url = home_url($wp->request);

    foreach ($items as $item) {

      // Update nonce of the logout link
      if ($item->attr_title == 'Logout') {
        $item->url = esc_url(wp_logout_url($current_url));
      }

      // Update username
      if ($item->attr_title == 'Identity') {
        $item->title = get_current_user_name();
      }
    }
  }
  return $items;
}
add_filter ('wp_nav_menu_objects','update_logoff_items_menu',10,2);
The proprietary “get_current_user_name” function
Here is one of the many functions written for this site. This function displays the first 30 characters of the user’s first and last name.
// Get the current user name and display the first 30 characters
function get_current_user_name() {
   $current_user = wp_get_current_user();

   if (!$current_user->exists()) {
     return;
   }

   return substr($current_user->user_firstname . ' ' . $current_user->user_lastname,0,30);
}
The modal windows
Now that the menu system is in place, it is time to create the modal windows, in total four.
- The login window
- The registration window
- The Forgot password window
- The Change password window
Creation of the login modal window
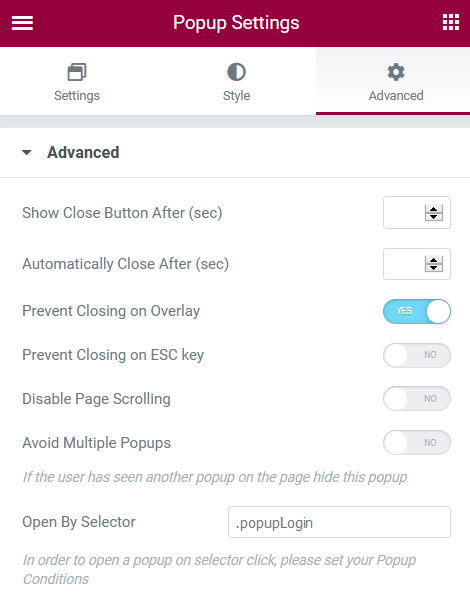
Creating a modal window with Elementor is done like any other template. The general settings are made with the little gear wheel at the bottom left of the window. The interesting option is in the advanced tab and is called “Open via selector”. This is the one that will link the menu and the modal window. For the login window, this one is called “.popupLogin”. As it is a CSS class, we add a dot in front of the class name.
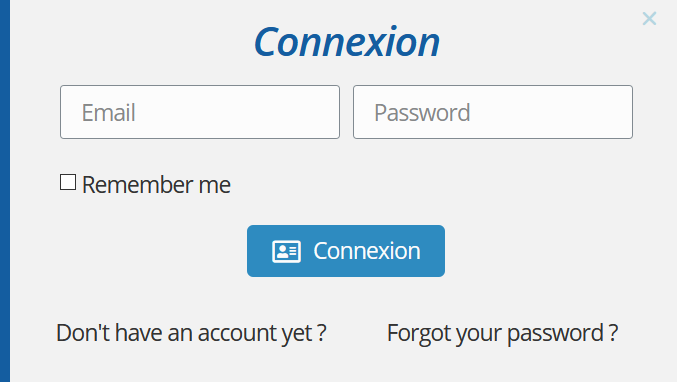
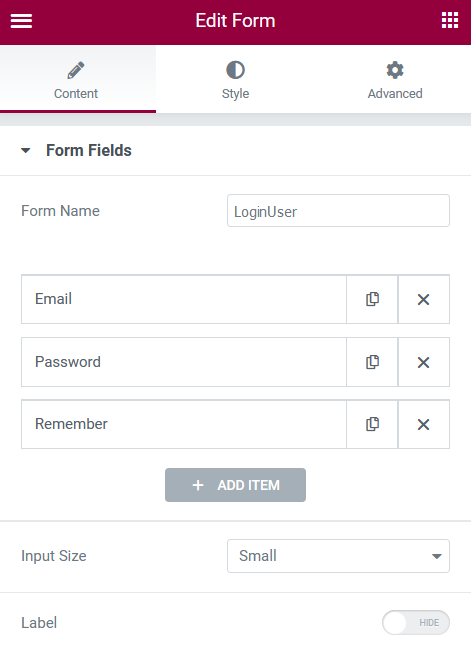
The window is built on the basis of a form widget and two links, each of which leads to another modal window. The form has three fields, email (which acts as a login name), password, a checkbox so that the website remembers the user, and a validation button. The form has a name “LoginUser”, which will be used to link the form and its login action.
Validation of the login form
The validation of the form is done by code. Elementor has created several actions to work with forms. One of them is called “new_record”. It allows you to add a custom form handler, such as an error message or a status.
The code below will check that the call is made from the “LoginUser” form, then retrieve the different fields, and finally, connect the user. If the user and/or the password does not exist, an error message and the status of the login form are added. The action stops here and the error message is displayed. Otherwise, a cookie is kept to identify the user and he/she is logged in.
This is certainly not the only way to connect a user, but this action has the advantage of adding a custom error message.
<?php
  /**
  * Plugin Name: Login_Form
  * Description: User login for the Elementor form widget
  * Author: Olivier Paudex
  * Author Web Site: https://www.fuyens.ch
  */

  function login_user_form($record,$ajax_handler)
  {
    // Check the Elementor form name
	  $form_name = $record->get_form_settings('form_name');
	  if ('LoginUser' !== $form_name) {
      return;
    }

    // Get the form datas
    $form_data = $record->get('fields');
    $creds = array(
      'user_login'        => $form_data['email']['value'],
      'user_password'     => $form_data['password']['value'],
      'remember'          => $form_data['remember']['value']
    );

    // Signon the user
    $user = wp_signon ($creds, false);

    // If error
    if (is_wp_error($user)) {

      // Default error message
      $error_message = 'The user does not exist or the password is invalid';

      // Display error message
      $ajax_handler->add_error_message($error_message);
      $ajax_handler->is_success = false;
      return;
    }

    // Set the cookie for the user session
    wp_set_auth_cookie ($user->ID);
  }
  add_action('elementor_pro/forms/new_record','login_user_form',10,2);
?>
Link with the modal registration window
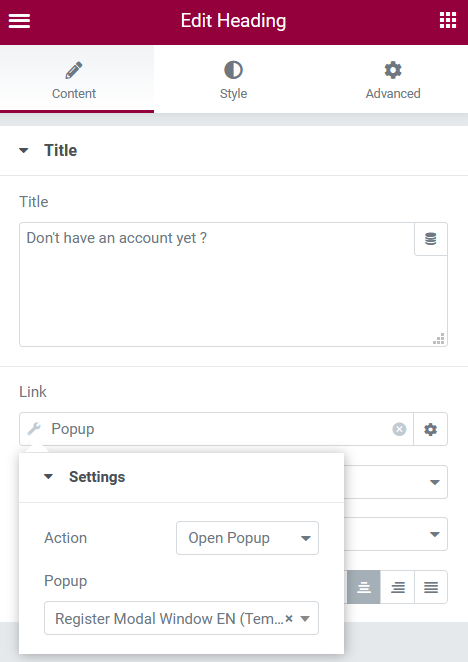
The registration form is activated with the link “Don’t have an account yet ?”, on the login window. We can add an action on an object of type “Title”. Here, the link is of type “modal window”, the action is to open a modal window and this must be the registration window.
Creation of the registration modal window
The registration modal window does not differ much from the login modal window, with the big difference that the latter must send a message to the new user in his mailbox inviting him to agree to the account creation. This also protects against fraudulent systems that would like to create fake accounts.
When creating a new user in the database of WordPress, it will have to be associated with two meta-data named “email_verification_key” and “email_not_verified”. The registration procedure must therefore create a link containing the URL of the site, accompanied by these verification keys and other data concerning the user. This link is then sent to the user in the form of an email message.
function set_email_verification_status($userID) {

    // Add metadata 'email_not_verified', when user register
    update_user_meta($userID, 'email_not_verified', true);
    update_user_meta($userID, 'email_verification_key', wp_generate_password(12,false,false));
  }
  add_action('user_register', 'set_email_verification_status');
At user authentication, if the meta-data “email_not_verified” is true, then the account is blocked.
function get_email_verification_status($user) {

  // Add error if account email is not verified
  if (get_user_meta($user->ID, 'email_not_verified', true) == true) {
    $user = new WP_Error ('inactive_account', pl__('Inactive account'));
  }

  return $user;
}
add_filter('wp_authenticate_user', 'get_email_verification_status',10,2);
The code snippet below sends an email to the user with the link to click to validate the account creation.
The “pll_translate_string” function and its shortcut “pl__” allows to write messages in several languages. This is done with the Polylang plugin. Messages written here in English are automatically translated into French if the user speaks French or remain unchanged if the user speaks English.
function register_user_form($record,$ajax_handler)
{
  // Get the verification email key from user metadata and create the link
  $email_verification_key = get_user_meta($user_id, 'email_verification_key', true);
  $link = wp_login_url() . esc_url_raw('?action=validation&key=' . $email_verification_key . '&login=' . rawurlencode($user_login) . '&lang=' . rawurlencode($language));
  $rplink = '<a href="' . $link . '">' . $link . '</a>';

  // Email validation
  if (function_exists('pll_translate_string')) {
    $message = pll_translate_string('Hello', $language) . ' ' . $first_name . ' ' . $last_name . ',<br><br>';
    $message .= pll_translate_string('A request for registration on', $language) . ' ' . get_bloginfo('name') . ' ' . pll_translate_string('has reached us and we thank you for it', $language) . '.<br>';
    $message .= pll_translate_string('To write a contribution to this site, select My Dashboard, then a topic in the left side panel', $language) . '.<br>';
    $message .= pll_translate_string('All new contribution will be subject to proofreading before publication', $language) . '.<br>';
    $message .= pll_translate_string('If you are not the author of this request, please disregard this email', $language) . '.<br><br>';
    $message .= pll_translate_string('Please click on the link below to validate your registration', $language) . '.<br><br>';
    $message .= $rplink . '<br><br>';
    $message .= pll_translate_string('The administrator of', $language) . ' ' . get_bloginfo('name');
  }

  // Add a subjet to the mail
  $subject = pll_translate_string('Inscription on', $language) . ' ' . get_bloginfo('name');

  // Add Text/HTML filter
  add_filter('wp_mail_content_type', function($content_type) {return 'text/html';});

  // Send mail
  wp_mail($email, $subject, $message);

  // Reset content-type filter to avoid conflicts
  remove_filter('wp_mail_content_type', 'set_html_content_type');
}
add_action ('elementor_pro/forms/new_record','register_user_form',10,2);
Redirection to the account validation page
The link created above to invite the user to validate his account must land somewhere. In this case, on the validation page. WordPress comes with many functions including “wp_login_url” which automatically redirects to the login page of this one, named “wp-login.php”.
For design reasons, this site provides its own validation page, called “account-validation”. The link will automatically redirect the browser to this personalized page.
The code below will retrieve the URL and if the destination is indeed “wp-login.php”, followed by the “action=validation” parameter, then the browser will be redirected to the customized page translated into two languages, to which we will add the account login and the validation key.
// Redirect to account validation page
function redirect_to_account_validation_page() {

  // Access to the global variable '$pagenow'
  global $pagenow;

  // Check and store the arguments
  $action = (isset($_GET['action'])) ? $_GET['action'] : '';
  $key = (isset($_GET['key'])) ? $_GET['key'] : '';
  $login = (isset($_GET['login'])) ? $_GET['login'] : '';
  $lang = (isset($_GET['lang'])) ? $_GET['lang'] : '';

  // Check if we're on the WP default login page, and ensure the action is 'validation'
  if ($pagenow == 'wp-login.php' && ($action == 'validation')) {

      // Redirect to french page
      if ($lang == "fr_FR") {
        $page = site_url() . '/validation-accompte/';
      }

      // Redirect to english page
      if ($lang == "en_US") {
        $page = site_url() . '/account-validation/';
      }

      // Redirect to the account validation page
      wp_redirect(esc_url_raw(add_query_arg(array('key' => $key, 'login' => $login),$page)));

      // Stop execution to prevent the page loading for any reason
      exit();
  }
}
add_action('after_setup_theme', 'redirect_to_account_validation_page');
The account validation page
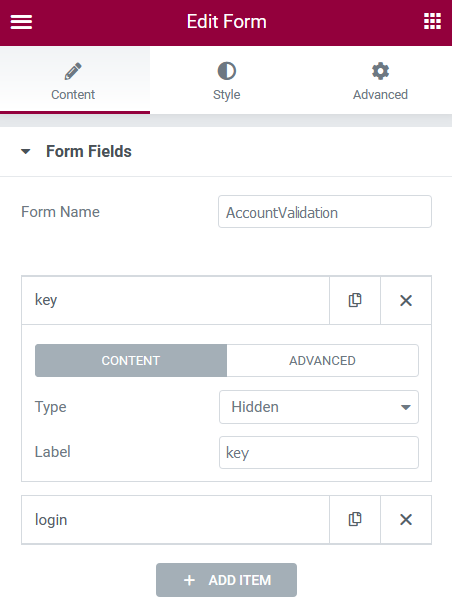
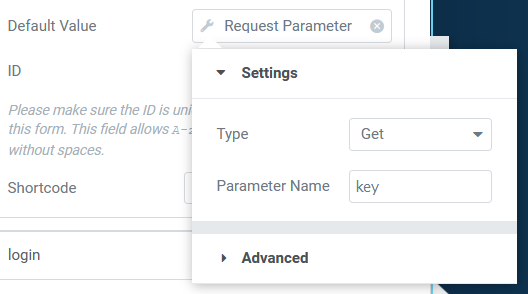
The account validation page has a form named “AccountValidation”, which itself contains two hidden fields, “key” and “login”. In the advanced tab of the form fields, it is possible to give as default value, a query parameter of type “Get”. Thus the hidden fields will be automatically filled with the data from the URL.

Once the form is validated by the user, a final action is called to validate the account and delete the “email_not_verified” metadata, which blocks its use.
function account_validation_form($record,$ajax_handler) {

  // Check the Elementor form name
  $form_name = $record->get_form_settings('form_name');
  if ('AccountValidation' !== $form_name) {
      return;
  }

  // Get the form datas
  $form_data = $record->get('fields');

  // Get the hidden fields
  $key = $form_data['key']['value'];
  $login = $form_data['login']['value'];

  // Get user by email
  $user = get_user_by('email',$login);

  // If error
  if (is_wp_error($user)) {
    $ajax_handler->add_error_message(pl__('Unknown user'));
    $ajax_handler->is_success = false;
    return;
  }

  // Get email verification key
  $email_verification_key = get_user_meta($user->id, 'email_verification_key', true);

  // Compare both keys and delete user metadata
  if ($key == $email_verification_key) {
    delete_user_meta($user->id, 'email_not_verified');
    delete_user_meta($user->id, 'email_verification_key');
  } else {

    // Key error
    $ajax_handler->add_error_message(pl__('Key not valid'));
    $ajax_handler->is_success = false;
    return;
  }
}
add_action ('elementor_pro/forms/new_record','account_validation_form',10,2);
Creation of the password reset modal window
The third modal window will allow a user to reset his password if he forgets it. The procedure is somewhat similar to the registration, to wit :
- A link that triggers the opening of the modal window from the login window.
- Sending an email message inviting the user to click on a link to reset their password.
- Redirecting to a personalized page, containing hidden fields, prompting the user to enter a new password and validate it.
- Update the password if everything goes well.
Creation of the modal window for changing the password
Last modal window of the site, this one opens from the “Logout” menu and reacts on the class named “popupChangePassword” (see the chapter on the creation of the logout menu). The principle is even simpler than for the password reset, since the user is already logged in, but wants for some personal reason to change his own password. Here, there is no need to send an email to the user to verify his identity, nor to redirect him to a personalized page. The only function that needs to be performed here is the verification that the user knows his current password.
Here is the code :
function update_password_form($record,$ajax_handler) {

  // Check the Elementor form name
  $form_name = $record->get_form_settings('form_name');
  if ('PasswordChange' !== $form_name) {
    return;
  }

  // Get the form datas
  $fields = $record->get('fields');
  $old_password = $fields['oldpassword']['value'];
  $new_password = $fields['newpassword']['value'];
  $confirm_password = $fields['confirmpassword']['value'];

  // Get current user
  $current_user = wp_get_current_user();

  // Check old password
  if (!($current_user && wp_check_password($old_password, $current_user->data->user_pass, $current_user->ID))) {
    $ajax_handler->add_error_message(pl__('The user does not exist or the old password is invalid'));
    $ajax_handler->is_success = false;
    return;
  }

  // Check if $new password = $confirm_password
  if ($new_password !== $confirm_password) {
    $ajax_handler->add_error_message(pl__('The two new passwords do not match'));
    $ajax_handler->is_success = false;
    return;
  }

  // Reset Password
  wp_set_password($new_password, $current_user->ID);
}
add_action ('elementor_pro/forms/new_record','update_password_form',10,2);
Reloading pages when closing a modal window
Last point concerning the modal windows. These act as interfaces between the user and his browser, with the server. For example, if a user wants to connect to the site, he will enter his login and password, then validate the login request. The request is then processed in PHP by the server which will connect the user to WordPress. But the user has no feedback in his browser about his connection. The solution is of course to reload the page. To achieve this, Elementor has created an event that is triggered when a modal window is closed and is called “submit_success”.
As it is an event that is triggered on the browser side, it goes without saying that it must be written in Javascript. And as for any JS code, it must first be queued.
Here is the code :
/**
* Plugin Name: RefreshPage
* Description: Reload a page after closing an elementor popup
* Author: Olivier Paudex
* Author Web Site: https://www.fuyens.ch
*/

// Refresh page on Elementor popup submit
jQuery(document).ready(function($) {
  $(document).on('submit_success', function(event, response) {
    location.reload();
  });
});
The final word
Here is a chapter on creating a relatively complete login, registration, password reset and update system, entirely made with Elementor and its form management functions. This is one of the strengths of the page builder that can easily be listed on the side of its advantages, it is able to create modal windows and forms, and all this in a native way, without adding additional plugins.
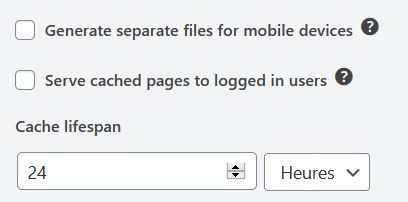
The real problem of a WordPress login system comes from its slowness. Indeed, to optimize a website, the first plugin to install is a page caching system. As soon as a user is connected to WordPress, the cache does not take into account the connected user and the login system does not work properly. Most caching plugins have an option to disable caching for logged in users, which is like not installing a caching plugin at all. Since pages are reloaded each time they are opened, the waiting time increases.
This site uses the WP-Optimize plugin, which does offer the option to not serve cached pages to logged in users. That being said, be sure to check the site’s cache plugin before creating a login system.