Introduction
Your website has been in development for weeks, even months. You have been working on it for many weeks and it is now the time to release it to the public. But have you thought about everything? It’s hard to be really sure. Are you sure it will work the way you want it to? Aren’t there any page links that don’t lead to anywhere, what in computer terms is called the 404 error. All these questions can be factors of doubt and put you in an uncomfortable situation. But there is a list of recommendations that, if you follow it, can save you precious time by correcting all these points before launching. Since this site is all about Elementor, all choices are in relation to the page builder. From simple WordPress configuration to setting up a backup plan in case of a crash, follow the guide.
Choose a theme
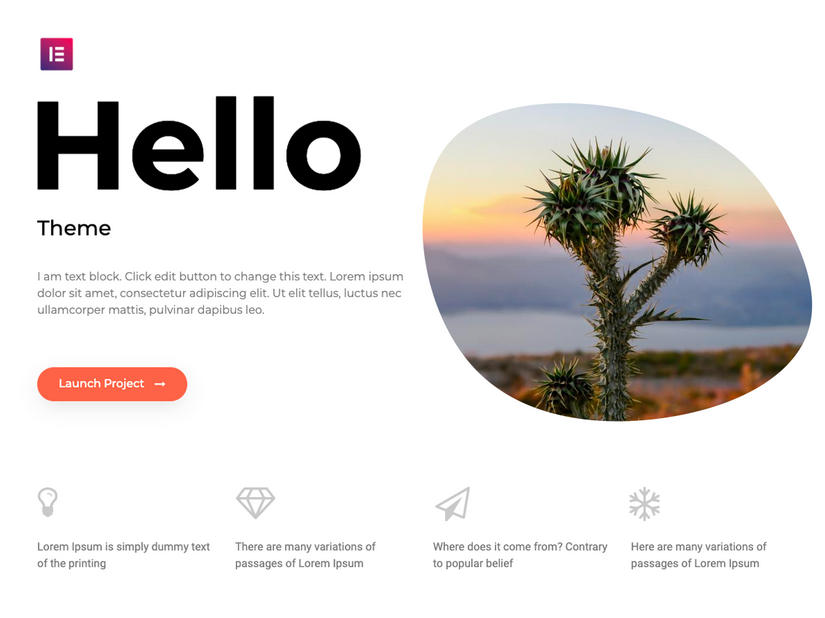
The first task that any web site administrator needs to do is to install a theme. This may be a daunting task, given the large choice of themes offered by WordPress. Most themes are created for a specific category of publications. It is the theme that will allow you to display the widgets, that is to say the different blocks of elements that will make up your website. With Elementor, we assume that we do not use this possibility to create widgets, because Elementor is a page builder by itself and does not rely on widgets. But because the choice and installation of a theme is mandatory in WordPress, Elementor has created its own theme whose purpose is to create blank pages. Its name is just as simple as its function, it has been named Hello.
Set a child theme
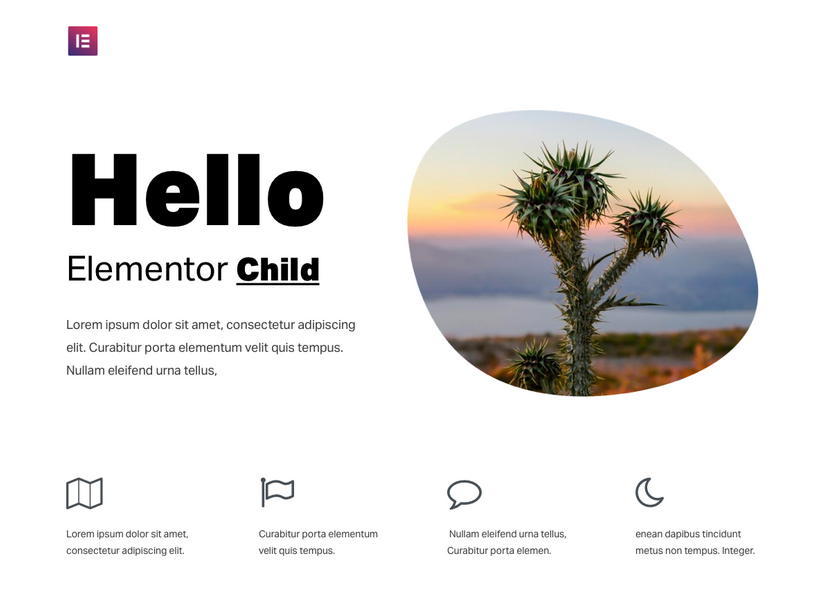
I won’t expand in this publication on the child theme, but be aware that it will give your website the ability to customize your functions. These functions are written in a language called PHP. It is also used for the global customization of the site by allowing you to use style sheets or CSS (Custom Style Sheets). It is recommended to install a child theme. For Elementor, the Hello child theme can be found in the WordPress library. Download and install it.
Set an emergency theme
Even if the latter has no useful function under normal circumstances, WordPress recommends installing a backup theme. Some will tell me that it is useless and they will certainly be right. Nevertheless, since it is a recommendation from WordPress, install a backup theme of your choice.
Purge all other demo themes
To keep the environment as simple as possible, remove from the list all other themes that WordPress has installed.
Clean up WordPress
Delete articles, pages and comments
WordPress is installed with articles, demo pages and dummy comments. You can remove them without hesitation.
Plugins cleaning
The second main task will be to remove everything that is not necessary for your website. Start by going to the plugins section (Extensions > Installed Extensions) and remove all the extensions you don’t need.
With Elementor, the recommended minimum number of plugins is 3.
- Elementor
- Elementor Pro
- A cache plugin
Elementor Pro is a paid extension, but its price is derisory compared to the possibilities it offers. It is almost indispensable, from the moment you decide to create a contact page with a form. As for the cache plugin, it is not mandatory, but highly recommended to speed up the loading of your various pages.
Cleaning and media compression
The media library contains all the images, videos, sounds and other files you use to create your website. In a new installation, you can delete everything without hesitation. Before launching your website online, make sure that the images are compressed and not unused. It is useless to keep extra images.
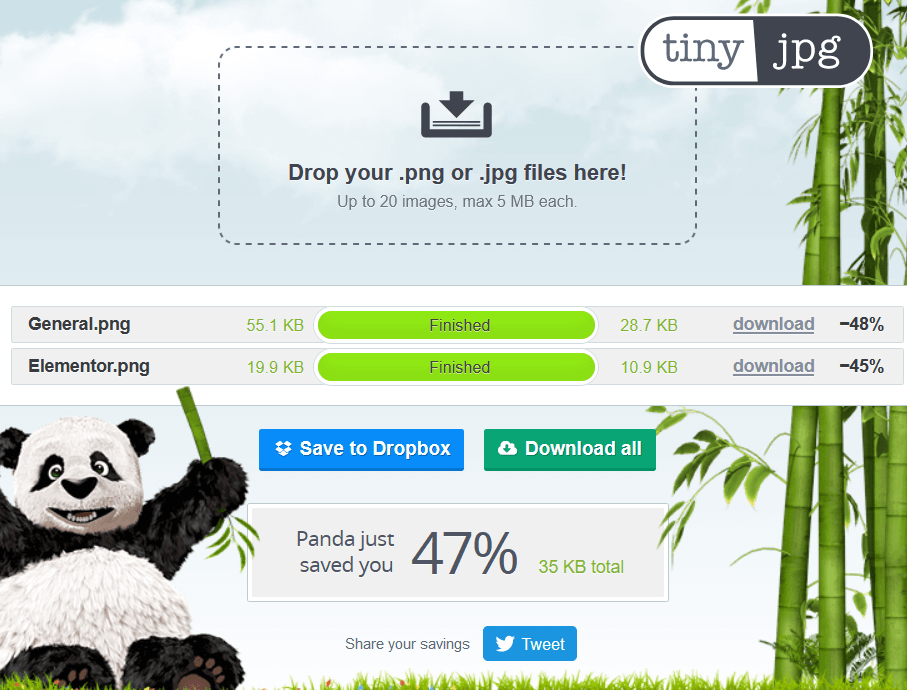
WordPress will automatically create several image sizes, which will avoid keeping huge images and thus unnecessarily slow down your website. To optimize your site, it is recommended to compress your images using an online tool or compressor such as tinyjpg.
Create a homepage
WordPress was designed as a CMS (Content Management System) for blogs, also called in english a platform for digitizing content. It has been quite criticized, in those early days, for its lack of possibilities to create a real website, with a main page, a presentation page, a contact page, etc…
Today, WordPress has added this feature by opening up to most publications, whether it is a simple showcase site, a blog, a site, an online store, an archive site. Yes, with WordPress, you can really imagine everything and create a website that meets all needs.
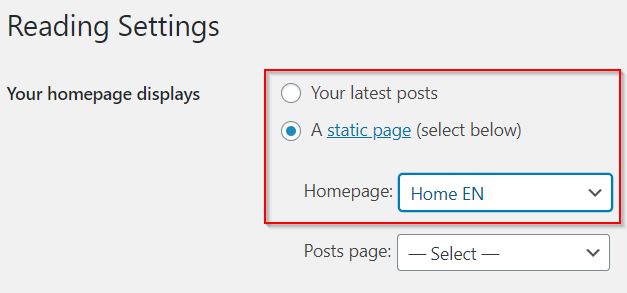
To assign a start page, go to Settings > Reading, then choose a page as static. Make sure you have one.
Create additional pages
Of course, your website will not have only one page. These depend a lot on the content of your site, but each site should at least contain a contact page, a maintenance page, a 404 error page. I will come back later on the creation of a structure and a tree structure of your different pages. With Elementor, you can create templates, which saves an incalculable amount of time from the moment you reuse a page or page structure over and over again.
Create the 404 page
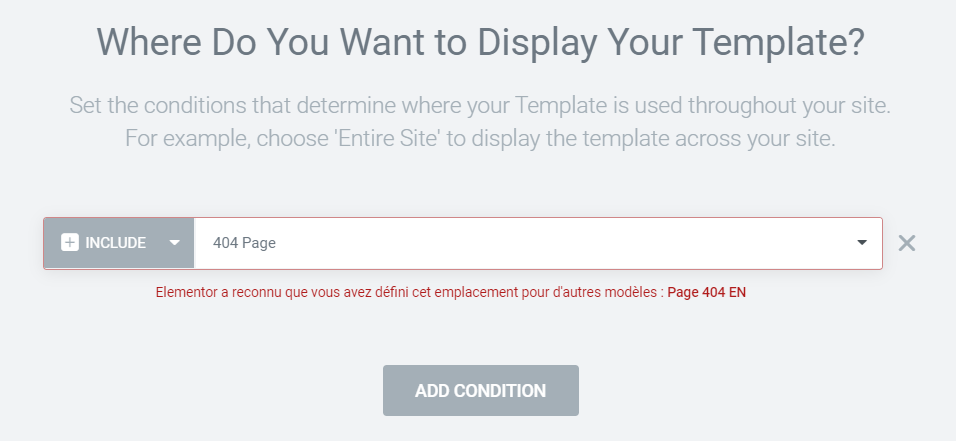
To create a 404 page, go to Templates > Theme Builder. Click Add, create your page and when saving, configure the display conditions as below.
Create the maintenance page
To create a maintenance page, go to Templates > Registered Templates. Click Add and create your page.
To activate your maintenance page, go to Elementor > Tools > Maintenance Mode, activate maintenance mode and select your template. You can easily see that the site is in maintenance mode with the red banner.

The maintenance page only appears if you are not the site administrator or if you are not logged in to WordPress. Don’t forget to disable it when you are done maintaining your site.
Create the privacy policy page
WordPress gives an example of pages in Settings > Privacy. We can largely draw inspiration from it
The settings
General settings
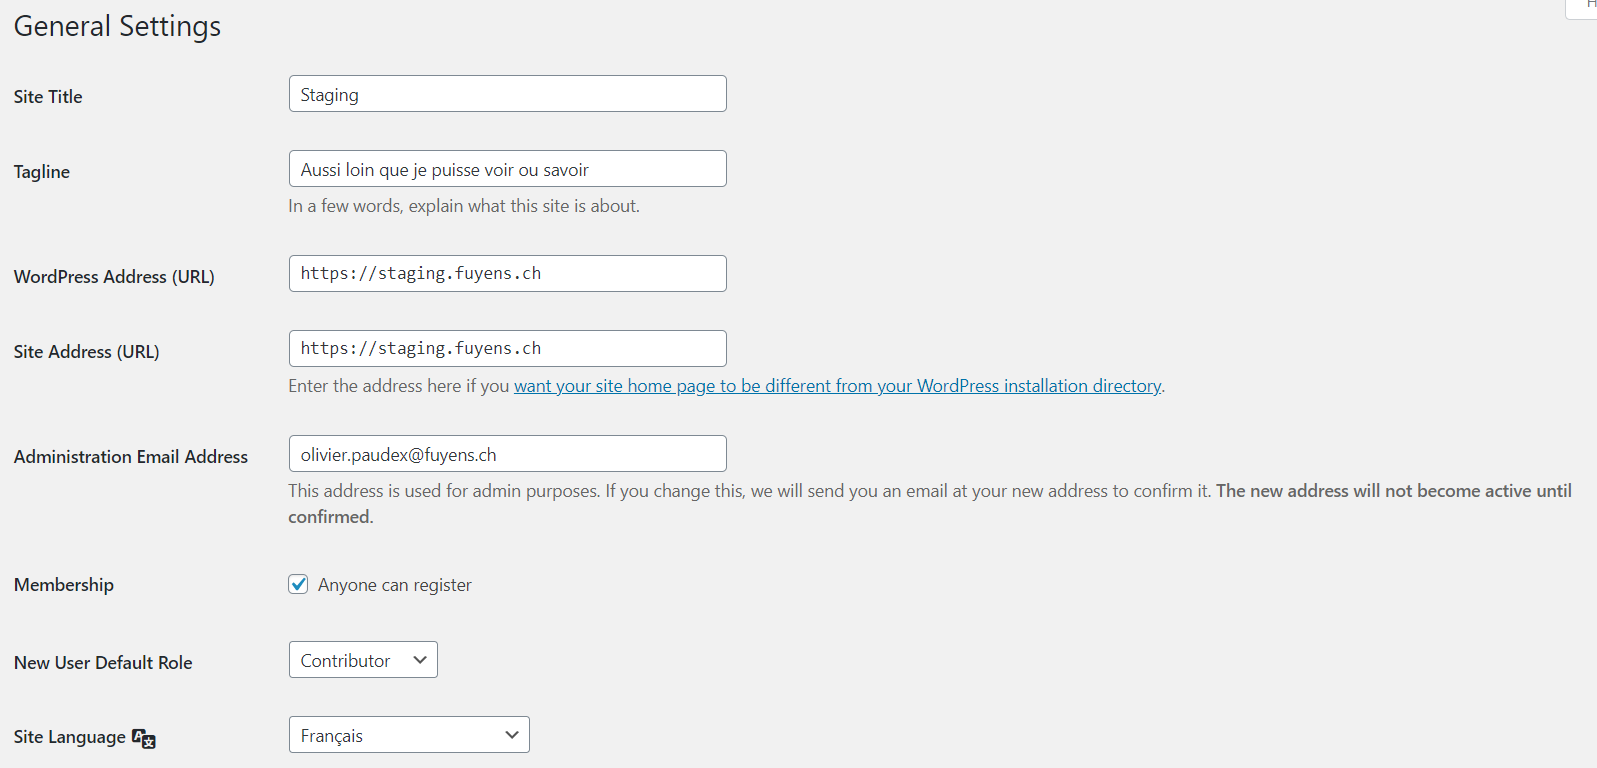
Start by going to the basic settings (Settings > General) and check that you have
- A site title
- A slogan
- The base URL of your site. If you are not yet using the secure HTTPS protocol, it is time to ask your access provider about the possibilities available to you.
- The main language of your site
- The time zone corresponding to your site (if it is international, set the local time zone)
- An email address for the administrator. This should always be the same domain name as the site itself, especially if you manage several websites. Also make sure that the administrator registered under Users matches the email noted in the settings.
- Check the box Registration > Everyone can register, only if you create a login interface. Otherwise, uncheck this option
- Set a default role for the user according to your needs, but never leave the default administrator role.
Indexing of the website
Don’t forget to uncheck the box in Settings > Reading, concerning the visibility of the site. Otherwise, search engines will not be able to index it.

Allow comments
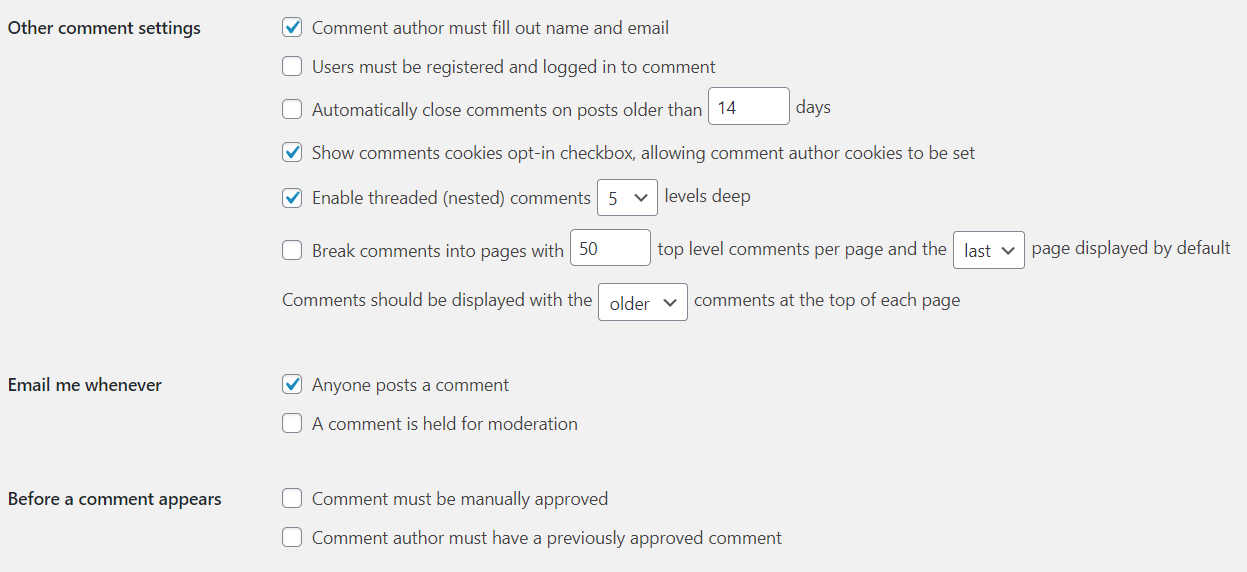
If you allow comments on your site, don’t forget to check the 3 options below in Settings > Comments.

The rest of the options are specific to each website. Nevertheless, I advise you the following
Display the avatars
It is always nice to see the authors of publications and comments. Don’t forget to check the box Display avatars.

Media size settings
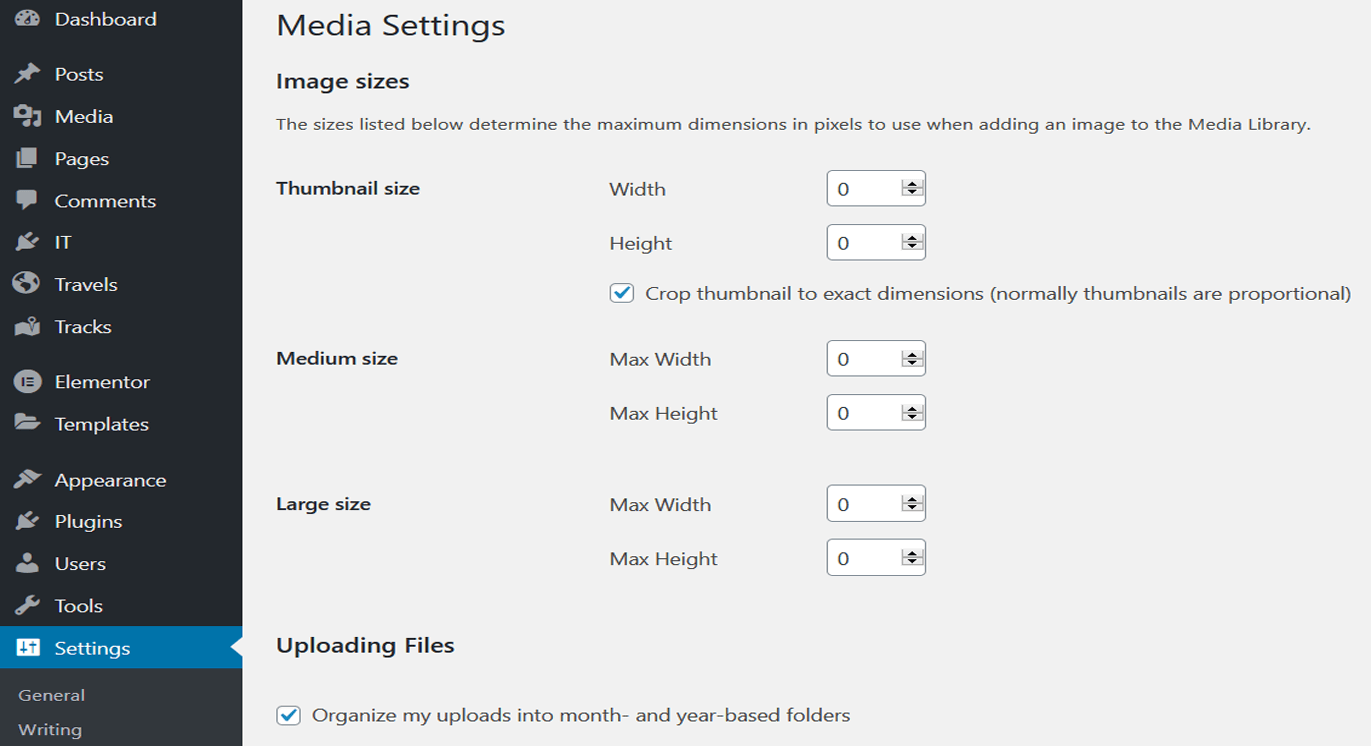
Let WordPress do it automatically and choose a setting without resizing. In Settings > Media, set all sizes to zero.
Setting the permalinks
In Settings > Permalinks, display the title of the publication in the URL. This will give you URLs that mean something and search engines can be much more efficient than with an ID number that doesn’t mean much.

Website customization
In Appearance > Customizer, you have the possibility to adjust the appearance of your website. If you use the Elementor theme, the options will be very limited because Elementor provides its own settings in its interface. Nevertheless, you need to make sure that
- That your site has a logo
- That you have given a title to your site
- That you have specified a slogan to your site
- That you have specified a site icon
You can create an icon with a lot of free software available on the internet such as favicon.io.
- Check again to make sure you have a homepage
The Forms
If you are using Elementor Pro, you will need to use the Forms widget. If not, you may create forms with another plugin such as WPForms. In any case, you need to test that your forms are working properly.
- Does it do the job it was created for ?
- Is there a confirmation (green) or error (red) message ?
- Does it send an email ?
In the case of forms, it is really necessary to get into all possible states and see if the behavior of the form is adequate.
If the form needs to send confirmation emails, it is more than necessary to create pseudo-profiles with real email addresses and see that these messages arrive at their destination.
The limit of hosting providers is often an obstacle to the implementation of forms that send confirmation messages. It is then a good idea to think about using mailing plugins like WP Mail. It is then possible to create an account with a mail provider totally independent from the web host. It is also advisable to install it to send massive mails for marketing campaigns.
The menus
Most websites have a menu for navigation. In WordPress, there are two elements that make up a menu, its structure and location. While the number of menu structures is infinite, the same is not true for its locations. They are limited depending on the theme. In the Hello theme, there is only one location available. If you want to create several menu structures, so to have several slots, you will have to add a few lines of code in PHP that I give you as an example. But I will come back to this subject later in another publication.
In the example below, I create two additional slots for the Login and Logoff menus.
function register_menus() {
    register_nav_menus (
      array (
        'login'                 => ('Login'),
        'logoff'                => ('Logoff')
      )
    );
  }
  add_action ('after_setup_theme', 'register_menus');
Use relative URLs links
This is an important notion in the creation of a website. It is recommended to use relative links. A relative link is nothing but an absolute link without its protocol and domain name.
- Example of absolute link : https://www.fuyens.ch/en/documents
- Example of a relative link : /en/documents
In menu configuration, relative links should be used whenever possible.

The last word
There is no sense in publishing a website if it contains errors, missing or missing links, badly proportioned images, etc…
Put yourself in the shoes of a casual visitor and click randomly on pages, fill out forms and stop acting like a developer, just for a moment. You’ll see that you can find many errors just by checking the sequence of pages.
So, test, then try again, once, twice, three times…
Good Luck.
