Introduction
Google’s ReCaptcha uses an advanced risk analysis engine and adaptive challenges to prevent malware from engaging in abusive activity on a website. It allows legitimate users to log in and interact with all forms on the site as well as block all others.
Version 2 vs Version 3
Version 2 presented a sort of challenge that the human user had to solve in order to proceed.
Version 3 analyzes human behavior using an algorithm that returns a score. If this is less than 0.5 out of 1, the probability that it is a robot is very high and the user will be blocked.
Both versions are free up to one million requests per month.
This site uses version 3 and this publication explains in detail how to enable ReCaptcha in version 3.
Getting the keys for the ReCaptcha
The first task to accomplish is to generate the ReCaptcha keys that will be needed for it to send validation requests.
- Open the Google website – https://www.google.com/recaptcha/about/
- Click on V3 Admin Console.
- Create a Google account if you haven’t already.
- Select version 3.
- Enter your domain(s).
- Save.
- Get the two authentication keys (the site one and the secret one).
Implementation with Elementor
The second part is just as simple. Just implement the ReCaptcha in the Elementor settings so that they are available in all forms.
- First, we need to configure Elementor with the newly obtained ReCaptcha keys.

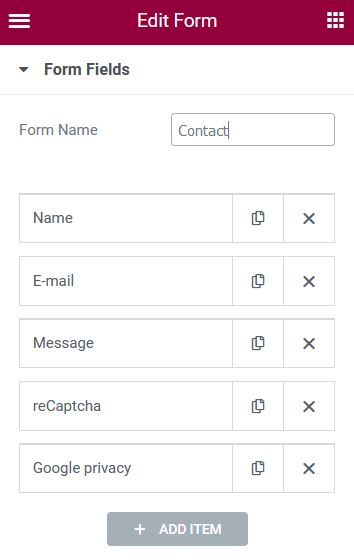
- Next, we need to create a form. In this example, it’s the site’s contact form.
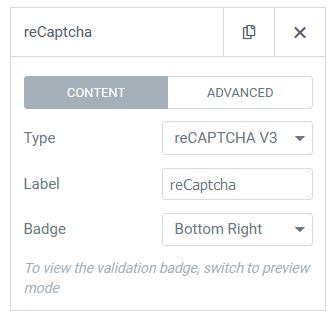
- You need to choose ReCaptcha version 3. The position of the badge does not matter
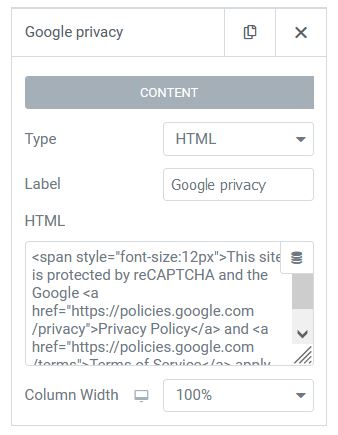
- In this example, a warning has been added. It was created with an HTML type field.
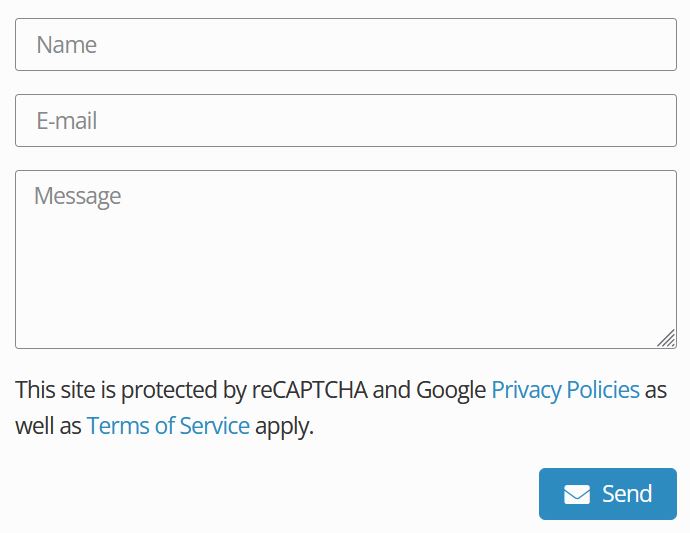
Here’s the result. The ReCaptcha field displays a badge, but it is possible to hide it with some CSS.
Hide badge
Here is the CSS code to hide the badge.
/* Recaptcha badge */
.grecaptcha-badge {
  display: none;
}
A bit of code …
The third task to be performed is the most difficult. We will have to code the ReCaptcha implementation for all the forms that are not made with Elementor, such as the comments form. Indeed, even if Elementor has a widget to display the comments area in a single type template, the form is the one that comes standard with WordPress, so no way to add a Recaptcha field on it.
Start by creating three files in the child theme.
- Enqueue_JS_Scripts.php
- Comments_Form_Recaptcha.js
- Comments_Form_ReCaptcha.php
Edit the “functions.php” file to include the two new PHP files. As for the Javascript file, it will be called by the queuing PHP action below.
include_once ($dir . '/php/Comments_Form_ReCaptcha.php');
include_once ($dir . '/php/Enqueue_JS_Scripts.php');
The Javascript function queue file
- Create a PHP file and name it whatever you like. In this example, it is named “Enqueue_JS_Scripts.php”. It will be used to queue two JavaScript files.
Paste the PHP code below:
// ReCaptcha library
if (!function_exists('Comments_Form_Recaptcha')) {
  function Comments_Form_Recaptcha() {

    // Only on single pages
    if (!is_admin() && (is_single())) {
      $jquery = array ('jquery');
      $version = '1.0';
      $in_footer = true;

    wp_enqueue_script('google-recaptcha', 'https://www.google.com/recaptcha/api.js?render=[Paste here the site key]', $jquery, $version, $in_footer);
    wp_enqueue_script('Comments_Form_Recaptcha', get_stylesheet_directory_uri() . '/js/Comments_Form_Recaptcha.js', $jquery, $version, $in_footer);
    }
  }
}
add_action("wp_enqueue_scripts", "Comments_Form_Recaptcha");- The first “api.js” file is an API from Google. It is the one that will allow to send authentication requests. We need to provide it with the site key previously created.
- The second file “Comments_Form_Recaptcha.js” will allow us to retrieve the authentication token.
The token retrieval file
- Create a file “Comments_Form_Recaptcha.js” or however you like and paste the code below:
- Don’t forget to replace the site key, the same as in the PHP file above.
- Be sure to name the token element by its name “recaptcha”. This is the field containing the token.
jQuery(document).ready(function($) {
  $('#commentform').submit(function(event) {

    // Get the token
    grecaptcha.execute('[Paste here the site key]', {action: 'submit'}).then(function(token) {
      document.getElementById('recaptcha').value = token;
    });
  });
});
The token verification and validation file
- Create a file “Comments_Form_ReCaptcha.php” and name it whatever you want and paste the code below.
- The filter “add_google_recaptcha”, will create an additional hidden type field whose name is “recaptcha”. It will create itself when the comment form loads. The rest of the code will display a warning message about the font and Google’s terms of use.
The “pl__()” function allows you to translate text using the “Polylang” plugin. You should remove it if your site does not use it.
- The “verify_google_recaptcha” action, meanwhile, will check that the “recaptcha” field above is not empty and call a validation function that will be executed before the comment is saved on the site.
- The “validate_google_recaptcha” function, will, finally, build the HTTP request using the secret key and the token. Google will return a positive or negative response based on the content of the comment.
function add_google_recaptcha($args) {

  // Add a recaptcha field
  $field = '<p class="recaptcha"><input id="recaptcha" name="recaptcha" type="hidden"></input></p>';
  $args['submit_field'] = $field . $args['submit_field'];

  // Add a Google warning
  $message = '<p class="recaptcha-warning">' . pl__('This site is protected by reCAPTCHA and') . ' ';
  $message .='<a href="https://policies.google.com/privacy">' . pl__('Privacy Policies') . ' </a>' . pl__('as well as') . ' ';
  $message .='<a href="https://policies.google.com/terms">' . pl__('Terms of Service') . ' </a>' . pl__('from Google apply') . '.' . '</p>';
  $args['comment_notes_after'] = $message;

  return $args;
}
add_filter('comment_form_defaults','add_google_recaptcha');

/************************************************************************************************************************************/

function verify_google_recaptcha() {

  // Verify the token before publishing the comment
  if (isset($_POST['recaptcha']) && $_POST['recaptcha']) {
    if (!validate_google_recaptcha($_POST['recaptcha'])) {
      wp_die("ReCaptcha Token is not valid or suspicious");
    }
  }
}
add_action('pre_comment_on_post', 'verify_google_recaptcha');

/************************************************************************************************************************************/

function validate_google_recaptcha($recaptcha) {

  // Build HTTP query
  $recaptcha_postdata = http_build_query(array(
    'secret' => '[Paste here the secret key]',
    'response' => $recaptcha,
    'remoteip' => $_SERVER['REMOTE_ADDR']));

  // Send query to Google with POST method
  $recaptcha_opts = array('http' => array(
    'method'  => 'POST',
    'header'  => 'Content-type: application/x-www-form-urlencoded',
    'content' => $recaptcha_postdata));

  // Verify the token
  $recaptcha_context  = stream_context_create($recaptcha_opts);
  $recaptcha_response = json_decode(file_get_contents("https://www.google.com/recaptcha/api/siteverify" , false , $recaptcha_context), true);

  // Return a response
  if ($recaptcha_response['success']) {
    return true;
  }

  return false;
}
The final word
There are, of course, other ways to filter out unwanted comments and posts on a website, starting with a slew of plugins. This solution was adapted from version 2 which was simpler and did not use Javascript, but Google decided to use the “grecaptcha.execute” function hence the Javascript call in version 3.


